Tableau Maps
Tableau maps, in my opinion, are the coolest visualization type in Tableau. I think Tableau’s mapping features are pretty robust so I wanted to create a blog that covers all the essential elements you should know about Tableau’s map visualization. This blog is for anyone wanting to know about all the most critical features and capabilities of Tableau maps. I will be showing you 5 different Tableau map examples in this blog so let’s get started.
Cleaning Tableau’s Geographic Data
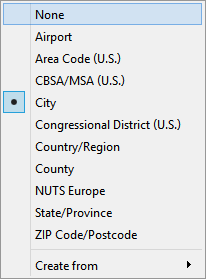
The first thing you have to do is connect to some geographic using Tableau. Tableau accepts a lot of different geographic data roles, look at the list below to see all the ones Tableau supports. In this example, we will be looking at data from The United States, but Tableau does support global data. In this example file, I will be using Zip Code, City, State, County, and Country. You can download the file and also the complete workbook using the link above.
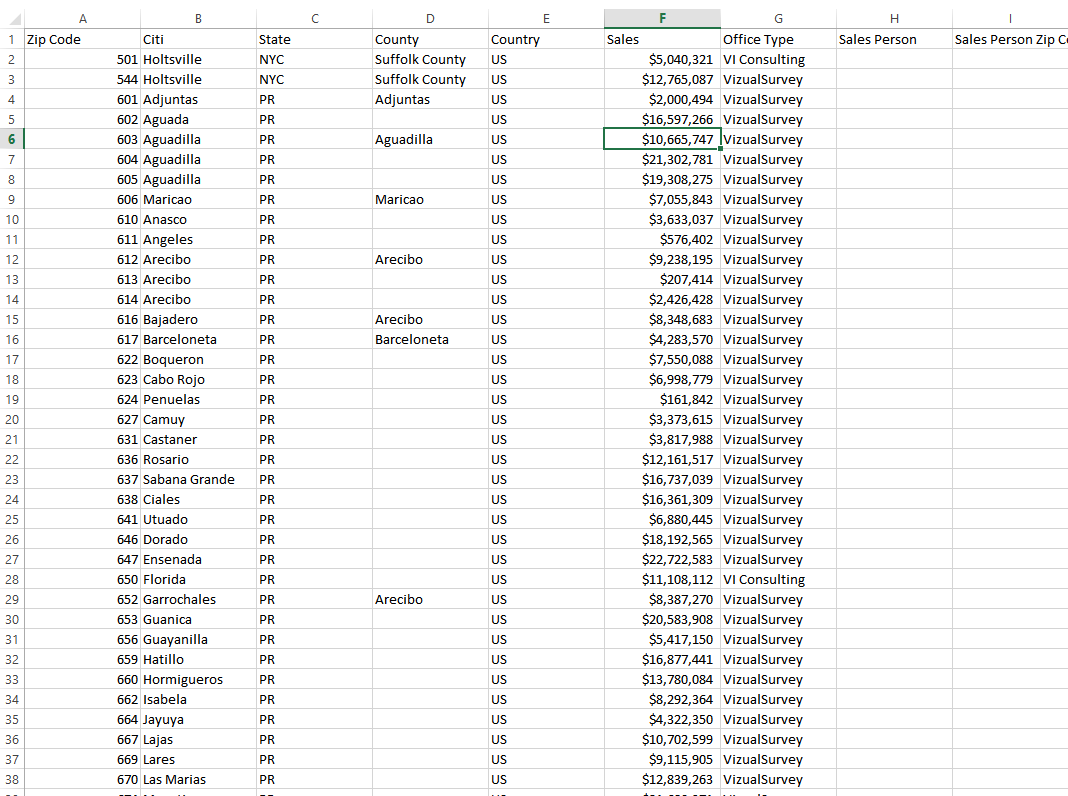
Now when uploading the geographic data, usually Tableau will assign the correct geographic role if it recognizes the header name, but in this example, you can see the header “Citi” is spelled incorrectly, and Tableau has tagged it as a string. If you need to do some major cleaning you can use Tableau Prep, but in this example, we are going to do some basic cleaning in Tableau’s data connection screen. All you have to do to change it to the correct geographic role is click on the data type icon and select the appropriate geographic role. You can do this in the data connection screen, or once you have the data pulled in to the worksheet interface. If you named it correctly when loading it, it would automatically have the correct geographic role.
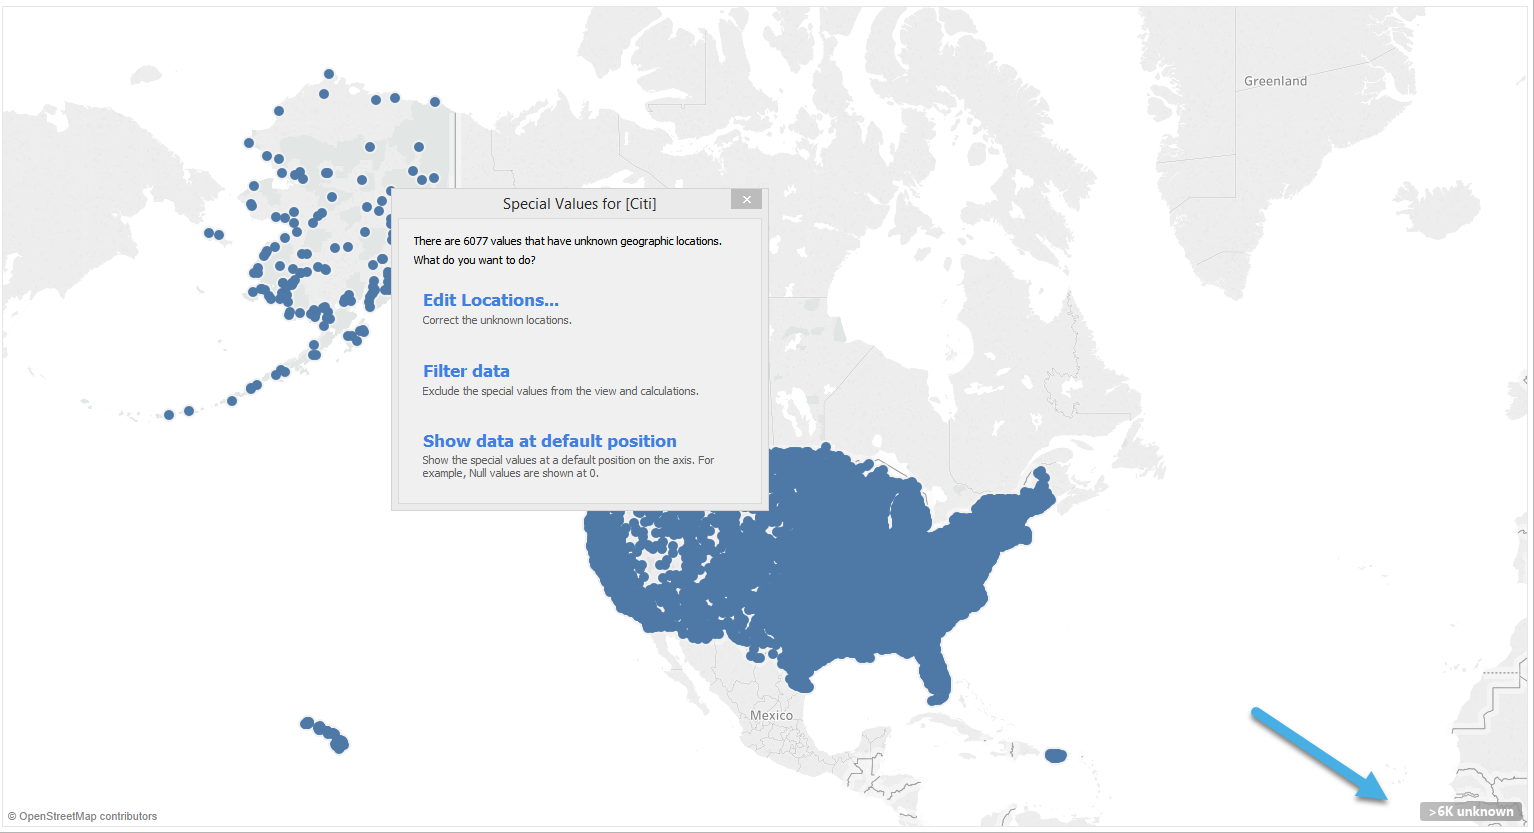
Now let’s go ahead and go to the view and double-click city to get the Tableau map rendered. You’ll notice on the bottom right you will see an unknown warning. This error box is critical to look at, and many people ignore it. If you click on it you will see a few different options; let’s start off looking at the Edit Locations option.
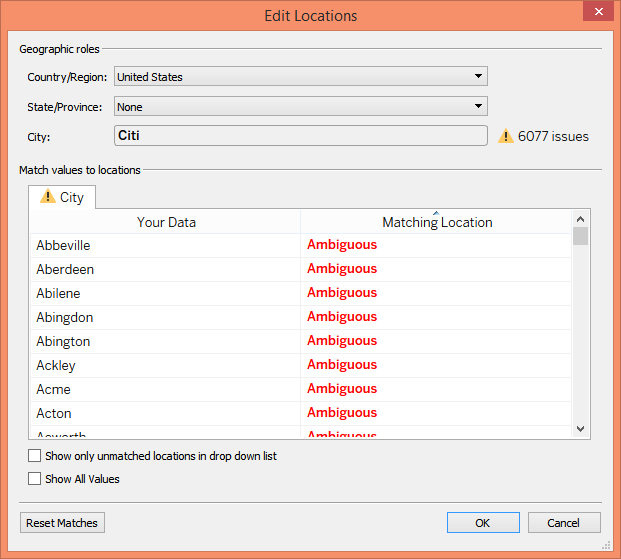
In the Edit Location screen, you will see the word Ambiguous in the matching locations; this is because these cities appear in multiple states/counties in the US, so Tableau is not sure what to do with them. In this example, all we have to do is add State to the view, and it will clean all all these Ambiguous errors. If you did not have State in the data and all your data was from one State, then you could select the State from the drop-down list.
I am going to go ahead and add State to my details, and you’ll see in this example the unknown count went down from >6k to >4k. That helped a lot, but there is still a lot of unknowns so let’s go ahead and look at it again. Now when we open the Edit Location option, you can see there are a few States that are unrecognized. There is a State value called “NYC” which should be the State New York, so to fix that all you have to do is type in New York in the box and select it. We could also assign the correct State for the other values, but for now, I am just going to hit Ok and filter those out so it does not affect any calculations I will be doing on this map. So now we have clean data to start building!
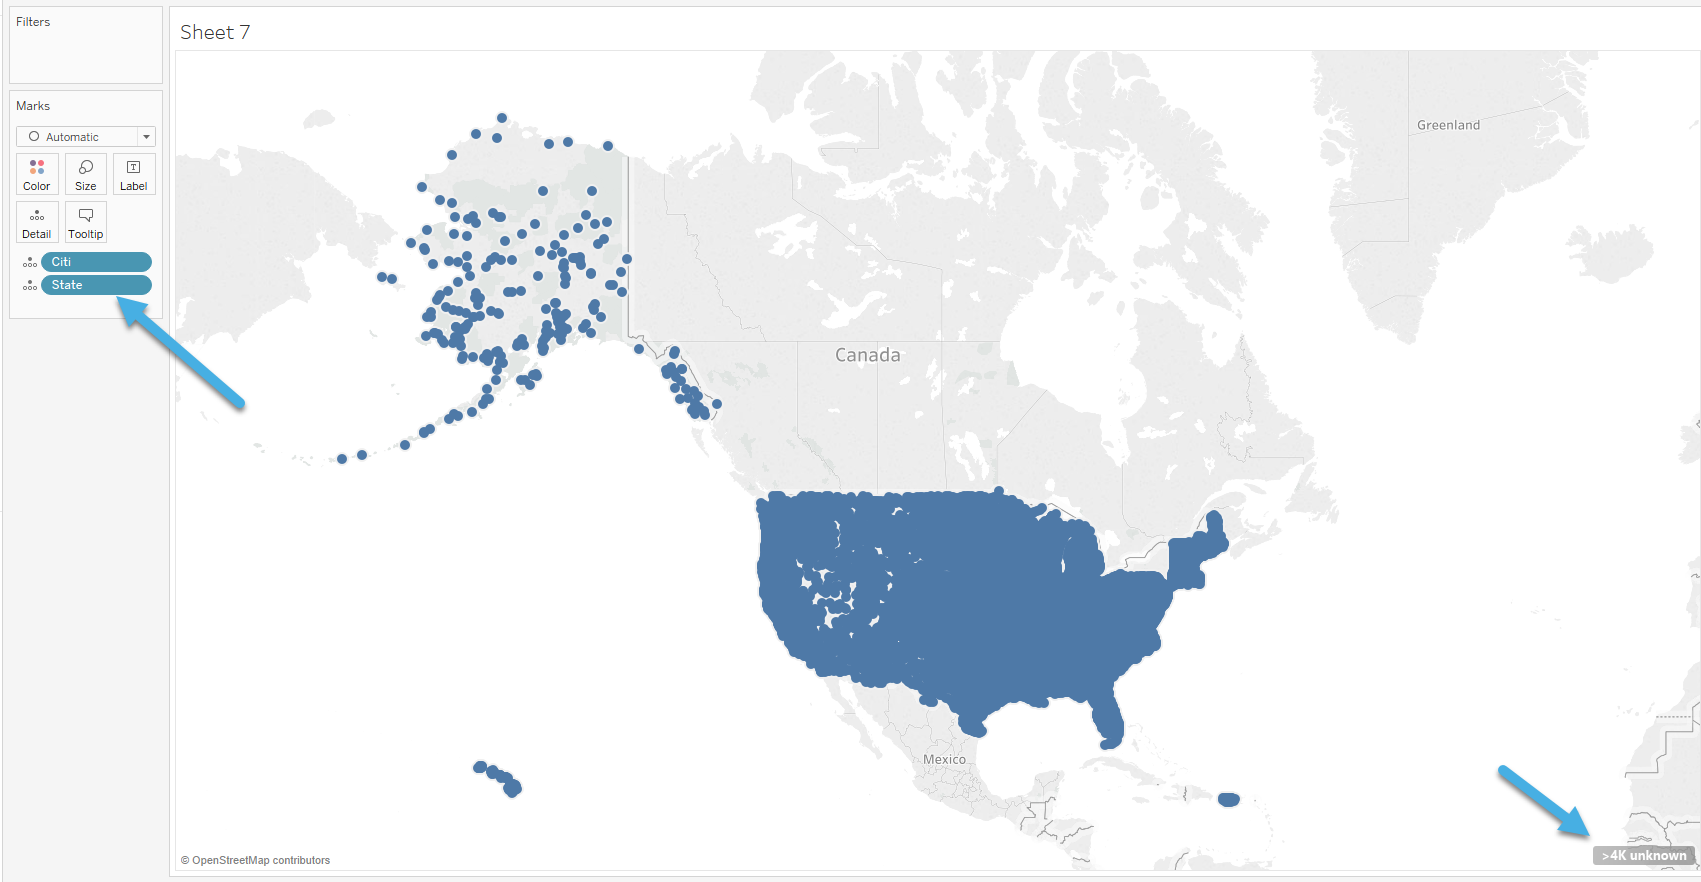
Tableau Filled Map
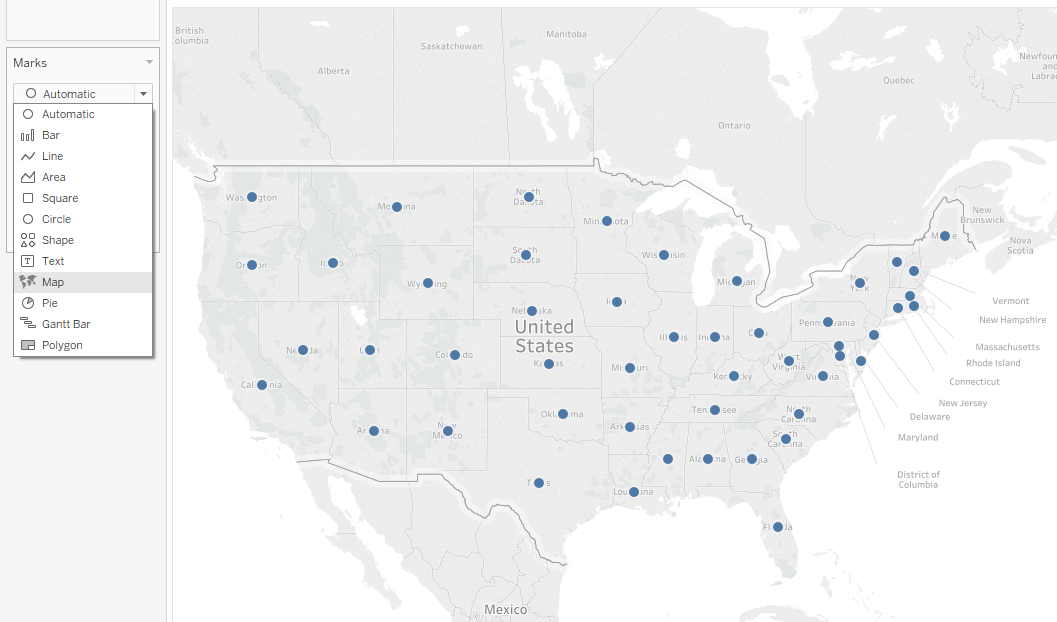
The first Tableau map I am going to be creating is the Tableau filled map. This map fills in the Country, State, County, Zip Code, etc. I am going to double-click on State to get the map started and then change the Marks to Map.
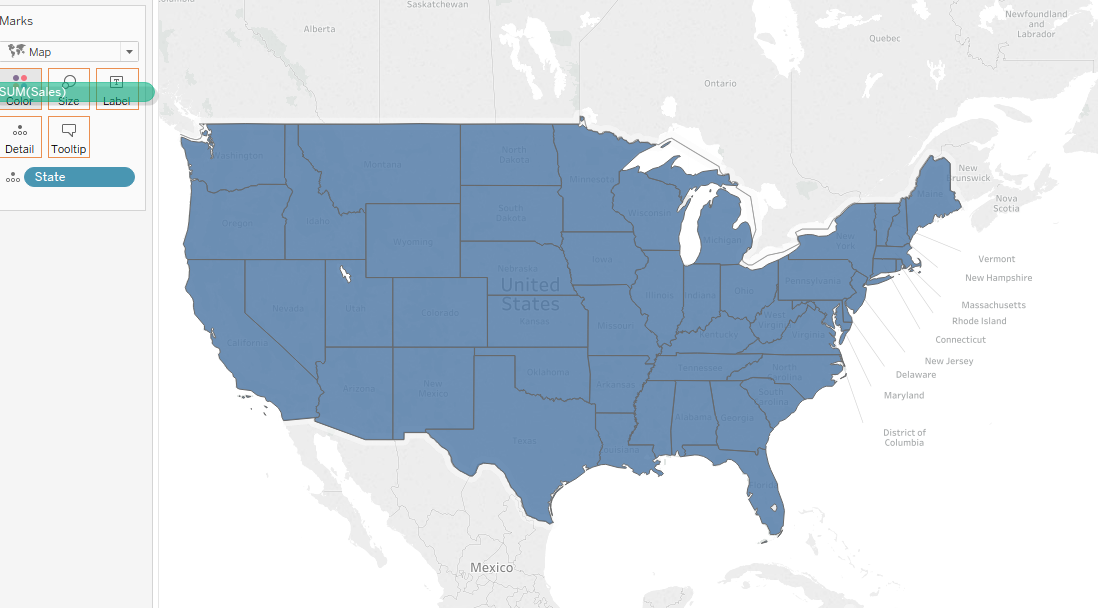
You will now have your filled map started; the next step is to decide how to color your map. You can either color it all one color by select the Color marks box, you can color it by a dimension such as State by dragging it into the Color marks box, or you can drag a measure to the Color mark box which is what I will be doing in this example.
Once you drag sales to the color box, the Tableau map will be colored by the sum of sales. You can always change how your measure is being aggregated by right-clicking the sum(sales) pill and replacing it with a different aggregation. The next thing I usually do is change the Color palette by clicking on the color box and selecting something that goes well with my dashboard. I sometimes will put a white or dark border around my States to make them stand out more. You can then drag the sum of sales pill to labels so you can see the numbers and right click the pill to format it how you like. This is what my ending Tableau map looked like.
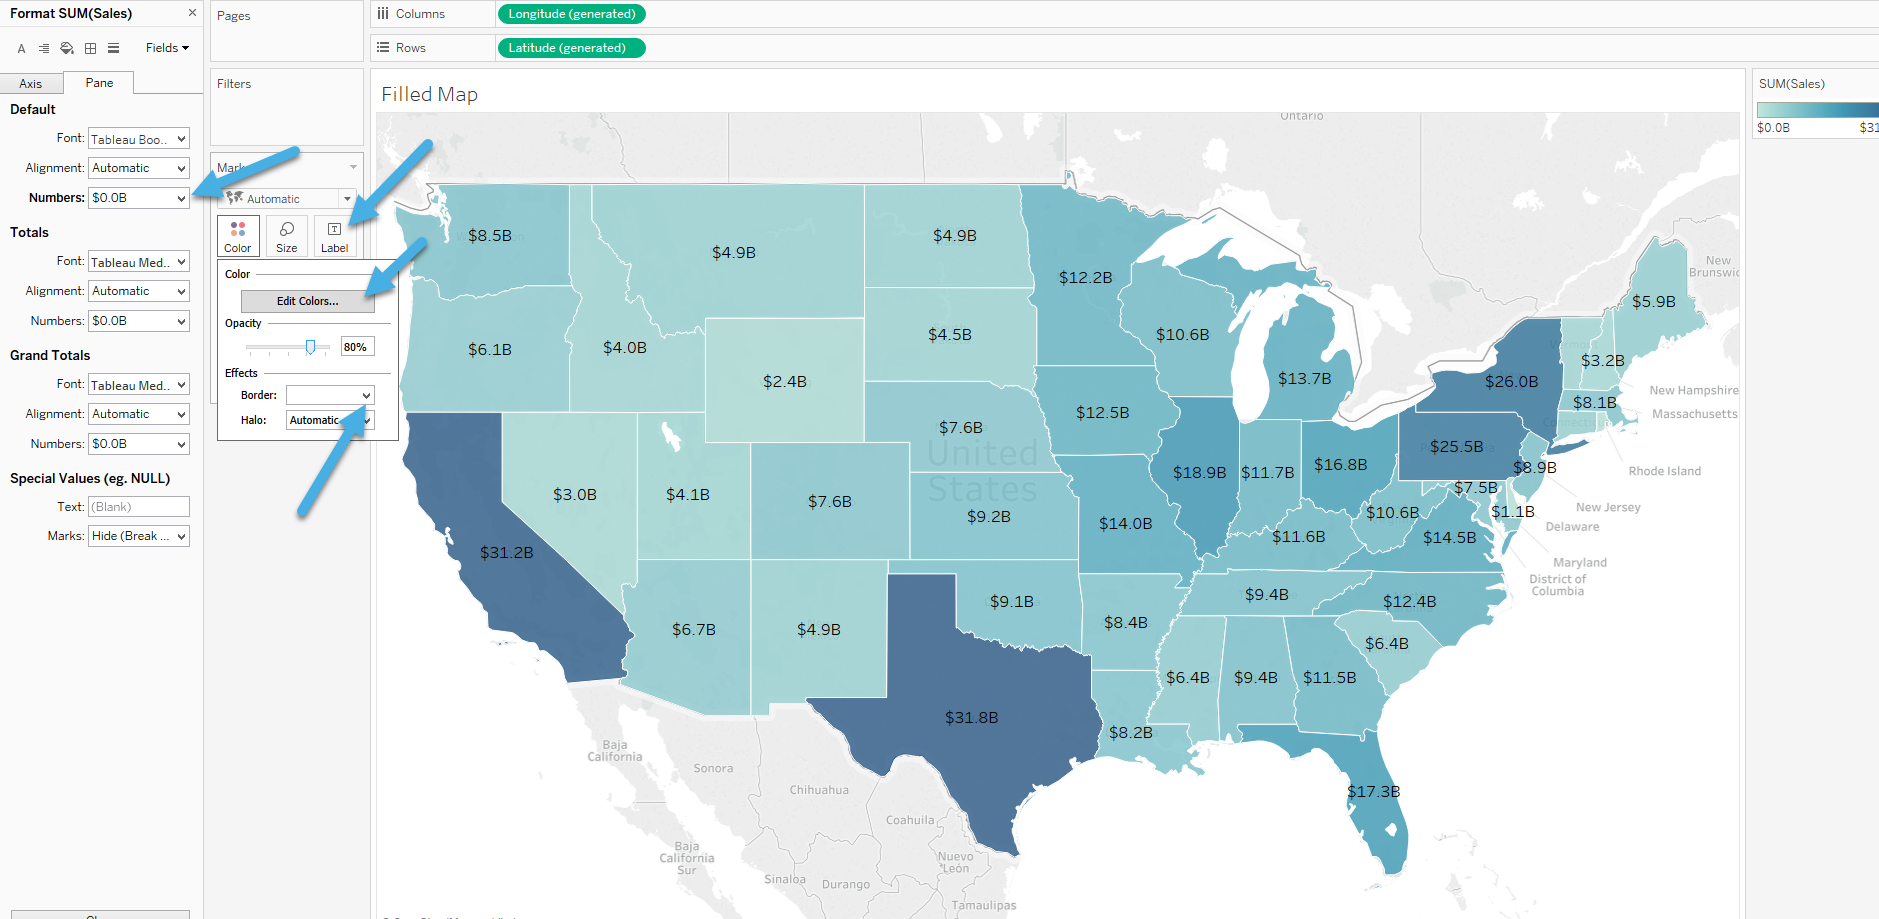
Tableau Symbol Map
Tableau’s symbol map is usually shown with a circle, but it can also be shown with other marks which we will look at later in this blog. In this example, I’ll be creating a symbol map using Zip Code. The first thing I will do is double click zip code just like before to get the map created. To make this view less crowded, I am going to be filtering the data down to only California and VI Consulting Office Type.
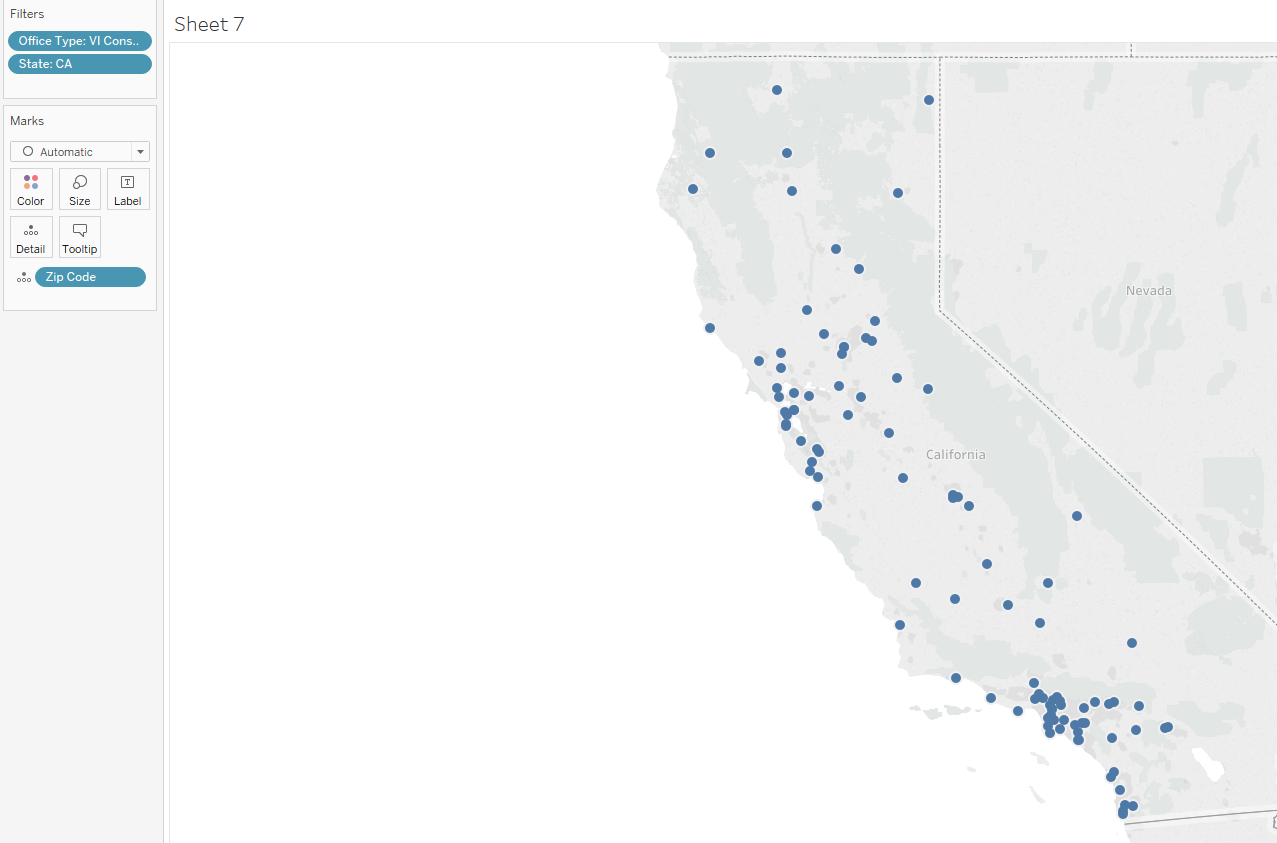
Now just like in the Tableau filled map, we can color these manually, by a dimension or a measure. In this example, I will be coloring my map by the sum of sales again by dragging sales into the color marks box. It might change your Marks to map but go ahead and change the Mark type to a circle to get a circle on the map for each Zip Code.
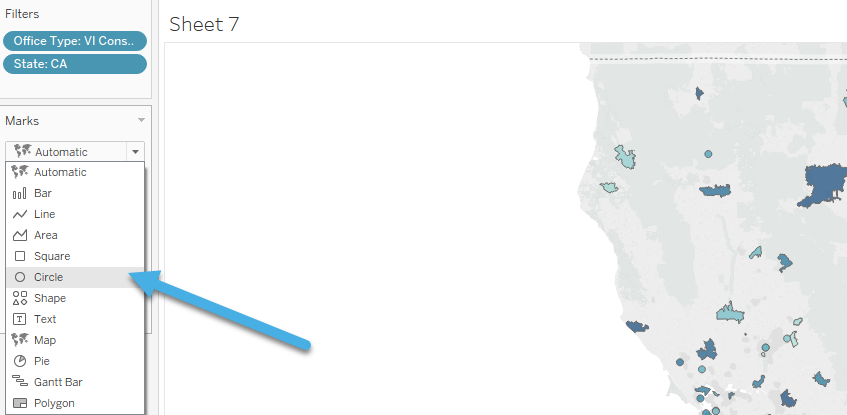
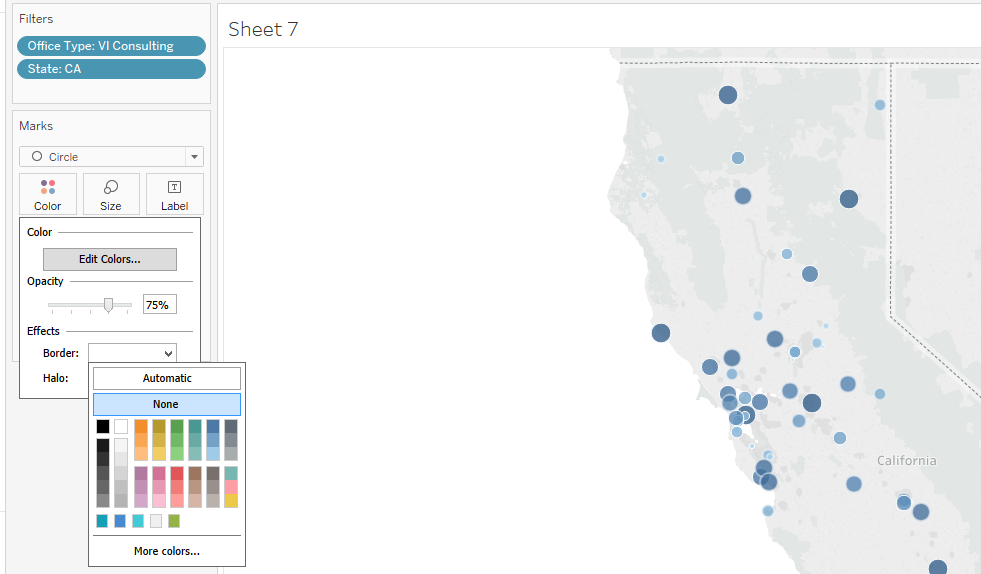
We can now customize it how we want. The first formatting option I change is my color palette by selecting the color mark box. While I am in there, I also decrease the opacity some and add a border to make the circles pop more. You can also drag the sum of sales pill into the size mark card to size the circles by the sales in each Zip Code. I also usually increase the overall size of all the circles by clicking on the size mark box and moving the slider to the right.
From here you can add labels to the map by dragging the sum of sales to the Label marks card. In my examples, the numbers take up a lot of space, so I am going to change the numbers to a currency but displaying the units in Billions. There are also some other formatting options you can play with if you go up to Map in the menu at the top and select Map Layers. Once you do this, you will have an option to change the style, add map layers such as Streets and Highways and Places Names, and also add Data Layers such as Population by Zip Code. To zoom, pan or select marks use the Tableau map options which you will find when you hover around the top left of the map.
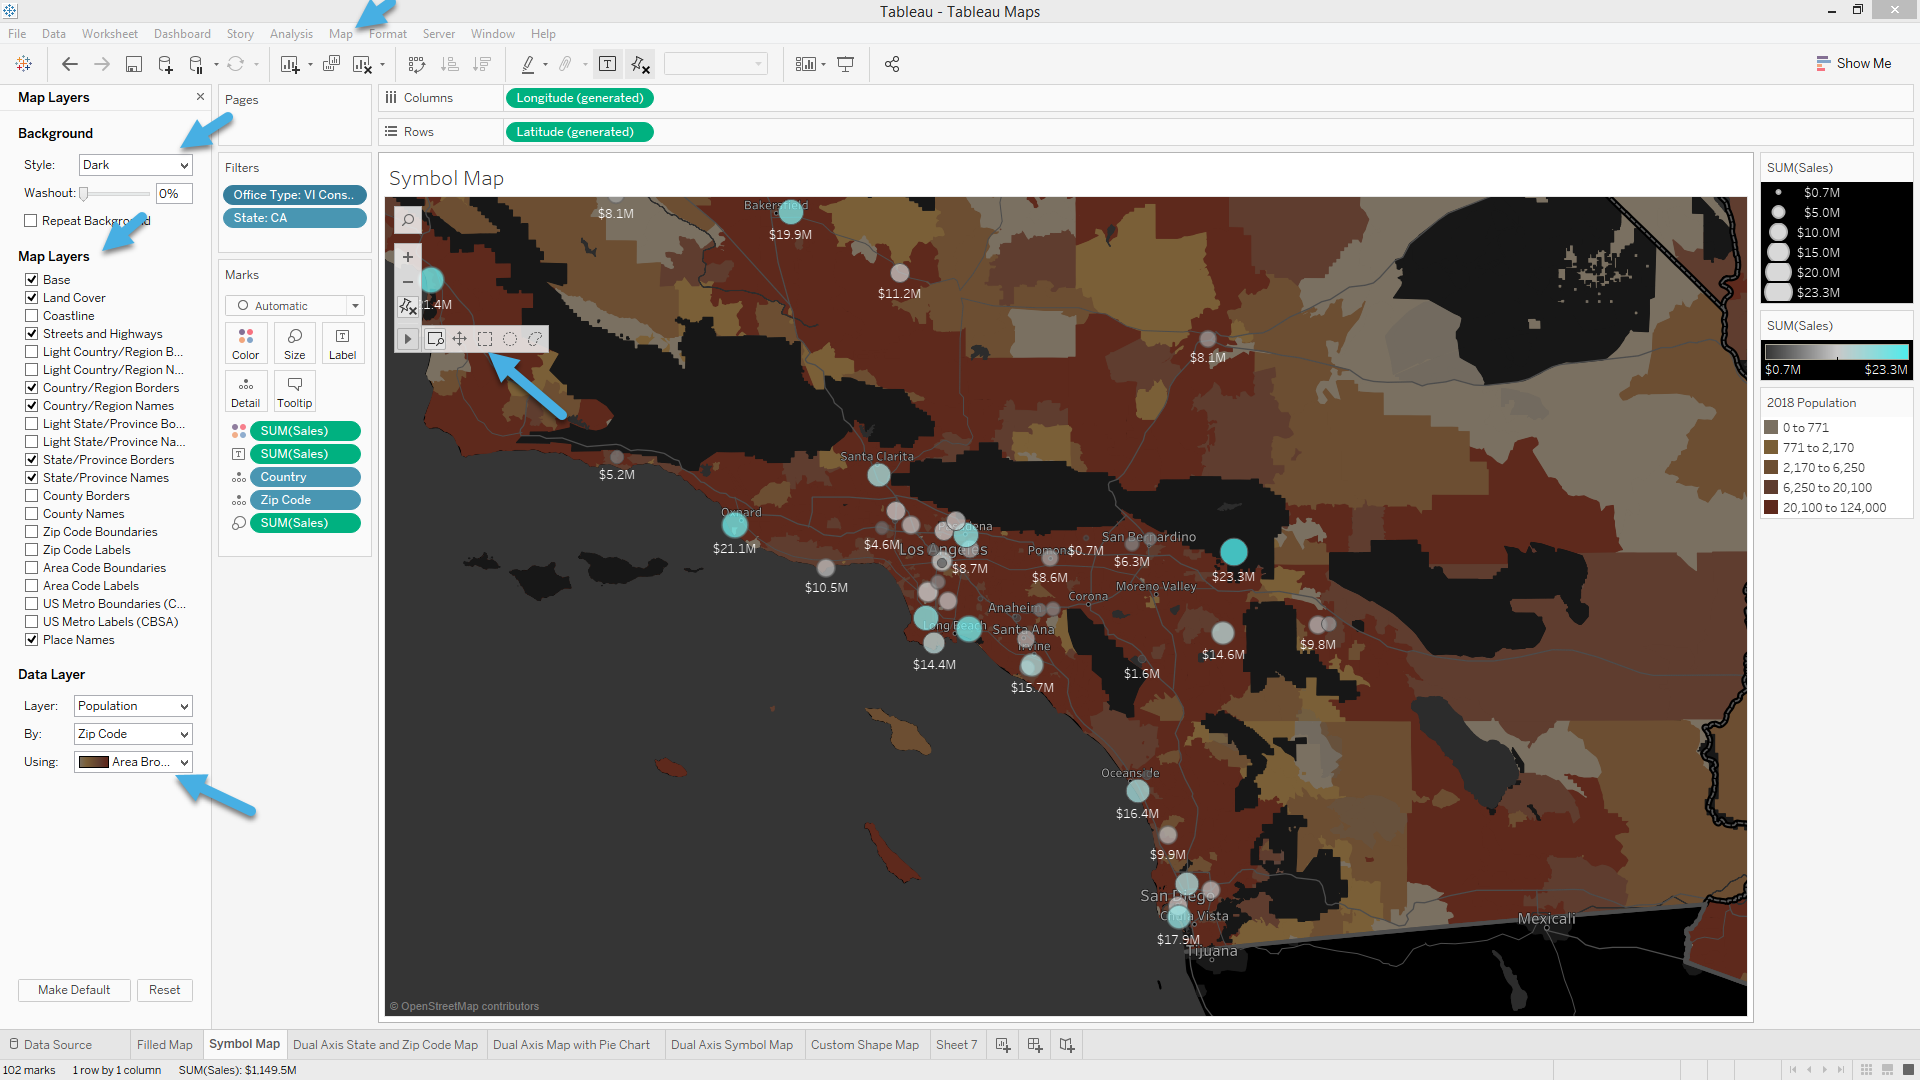
Tableau Dual Axis Map
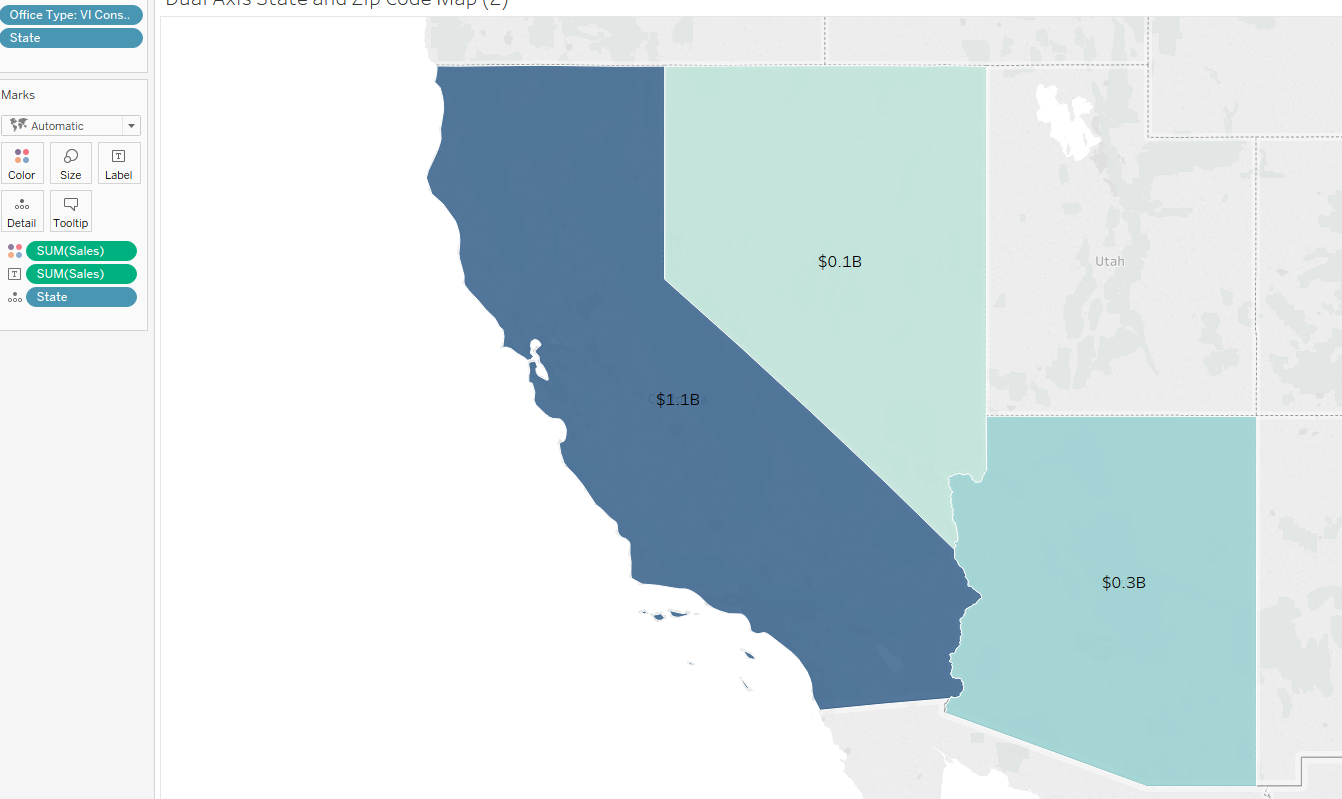
Now we got the basics out the way, let’s go ahead and get into some more advanced topics. Let’s create a Tableau dual axis map where we will have a Tableau symboled map stacked ontop a filled map. The first thing we need to do is create the map that will be on the bottom which will be our State filled map. I created the same filled map as the previous example but just filtering the data down to VI Consulting Office Type and the States CA, NV and AZ.
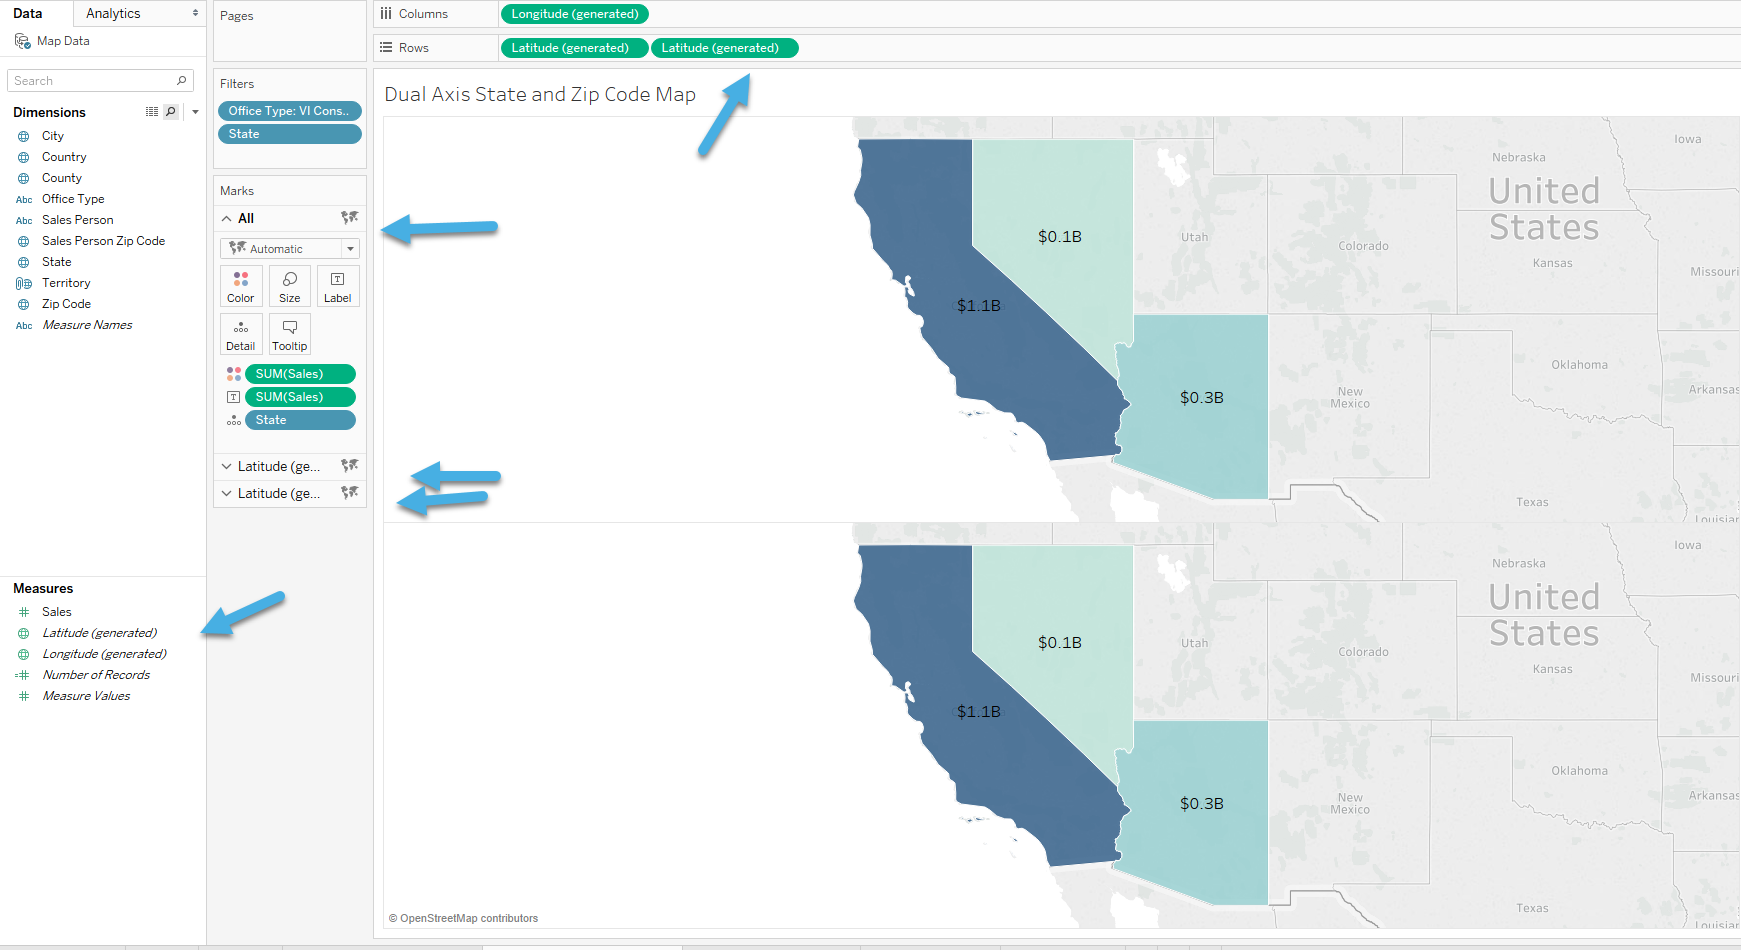
Now to create the bottom map we will grab latitude from our measures and put it next to the other latitude pill on the rows. This will create another map at the bottom of the current map and also create a few extra mark cards. If you look at the Mark card area, you will now see three different Mark cards. The first is the All which when you change something on this mark card it will affect the top and the bottom map, the one in the middle will affect the top map only and the one on the bottom will affect the bottom map only.
Since we already have the top map how we want it, we must now update the bottom map, we would do this by selecting the bottom marks card to get started. Once we are on the bottom marks card which will change the bottom map we will change the Mark type to a Circle, replace the State pill with the Zip Code pill by dragging it on top of it, remove the Sales pill from the labels and then drag the Sales pill that is in Color box to the size box. You can then adjust the size and color to your liking. Now the only thing left to do is to overlay these Tableau maps on top of each other by right-clicking the Latitude pill on the right and selecting Dual Axis.
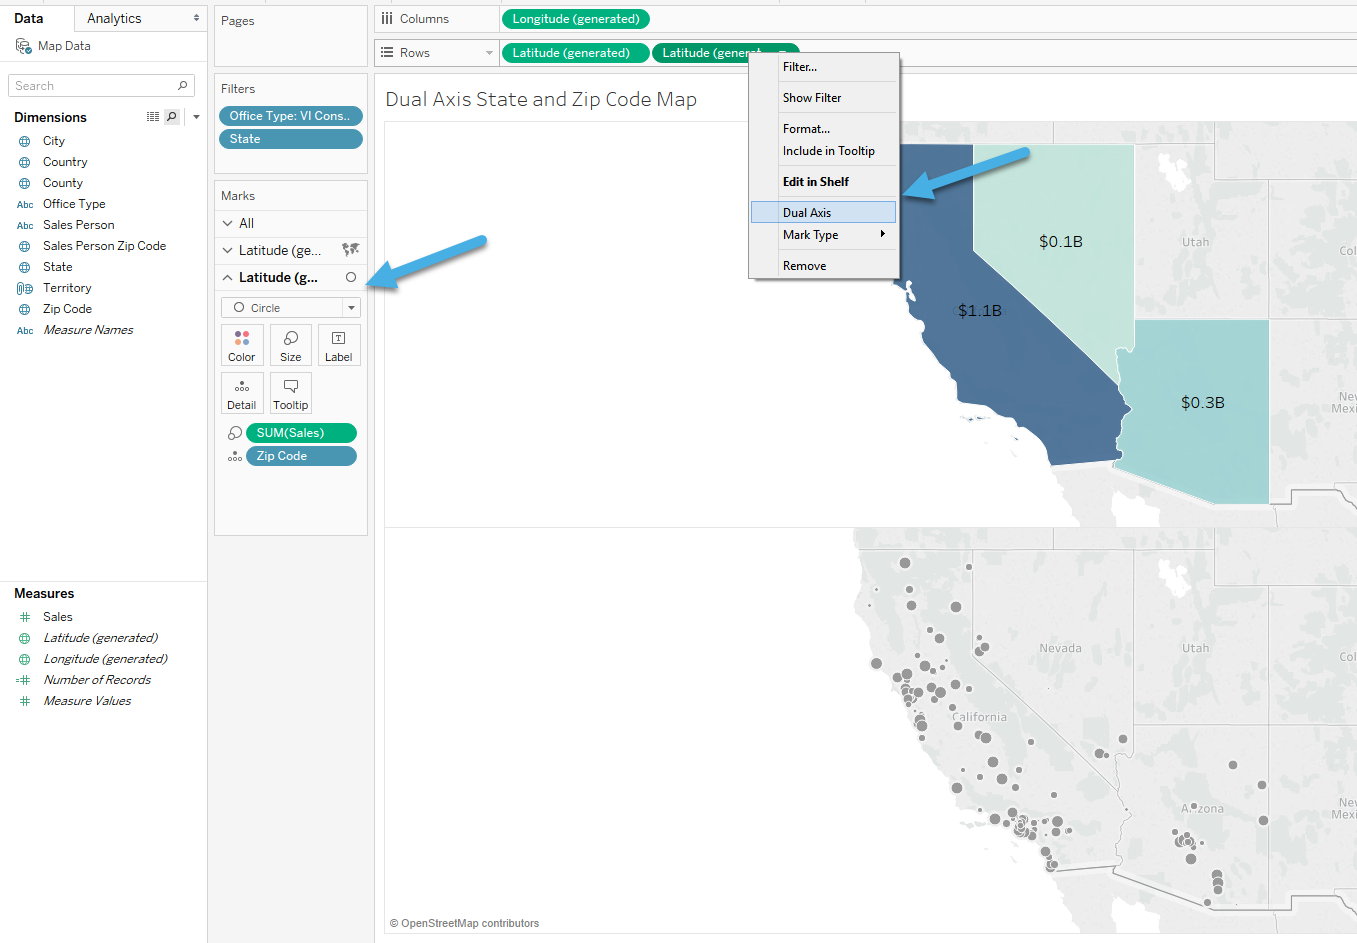
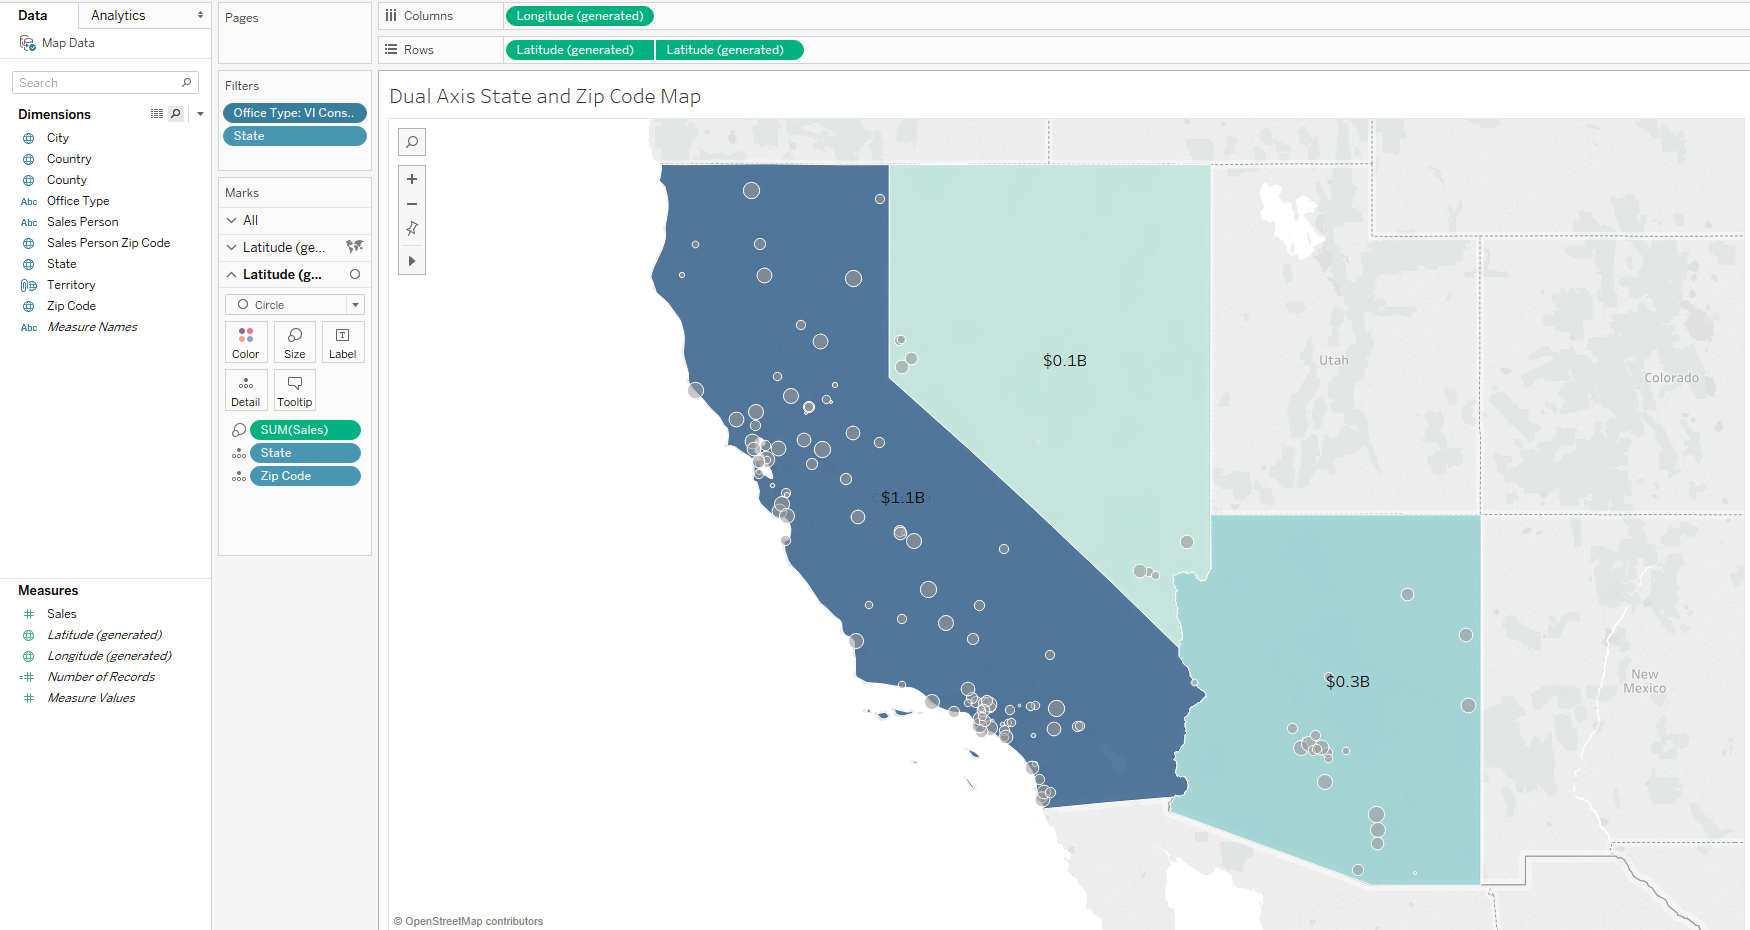
Tableau Dual Axis Map with Pie Chart
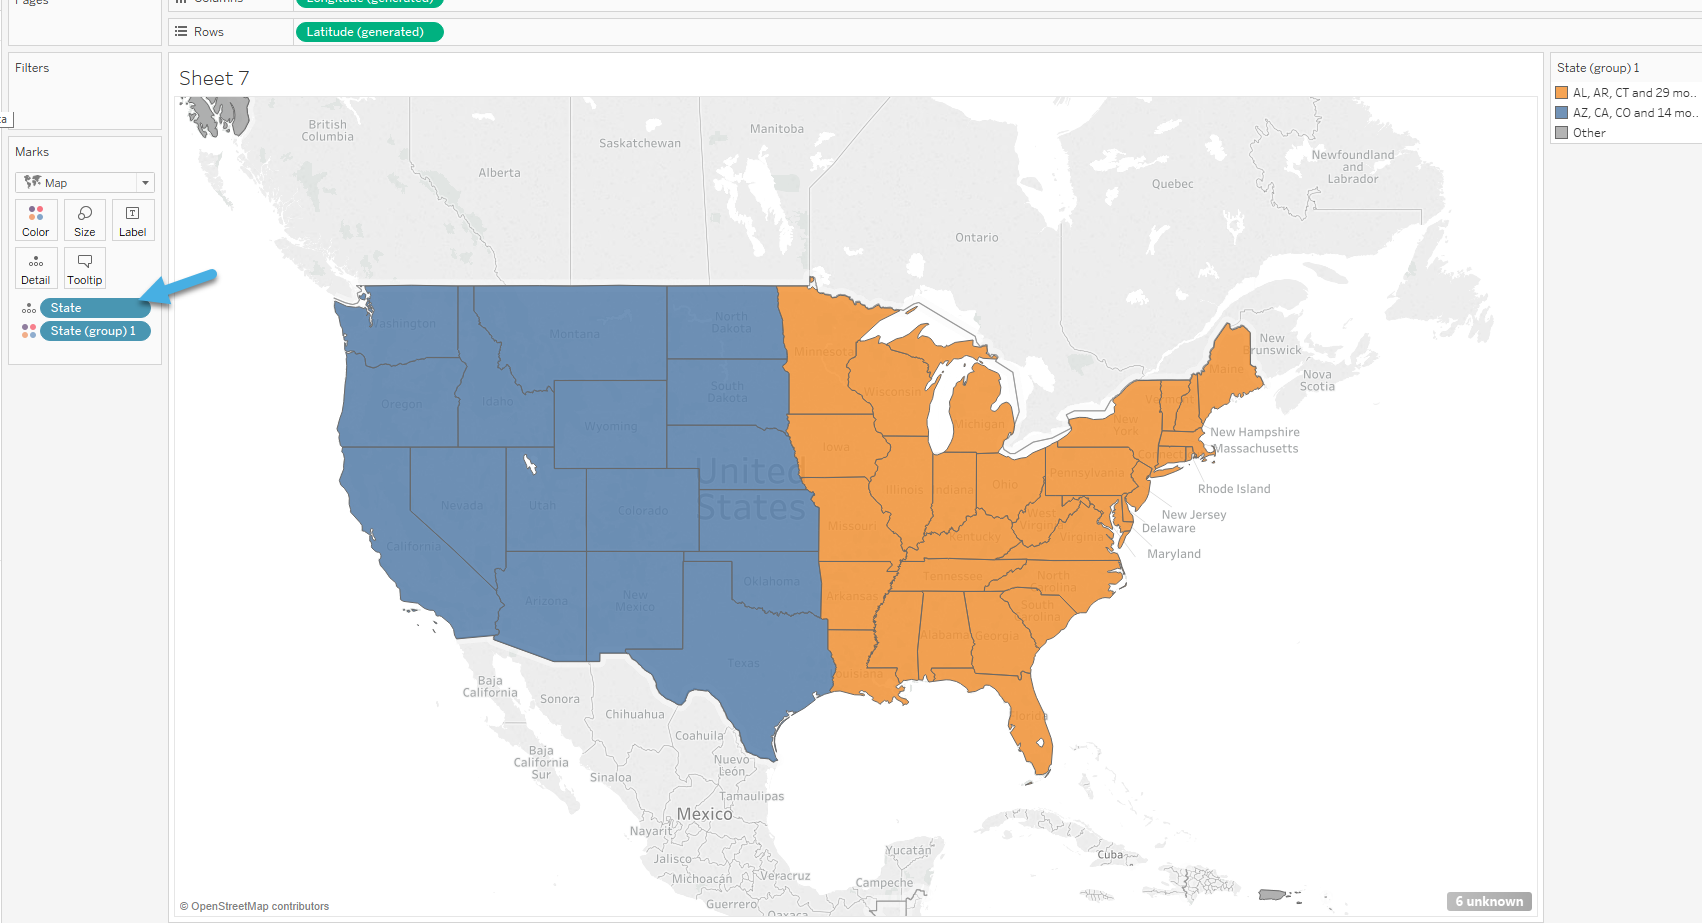
In the previous example, we created a Tableau dual axis map using two different Tableau Map visualizations, but we didn’t have to use 2 Tableau maps to do this. In this example, I am going to be creating a Tableau dual axis map using a Tableau custom territory filled map and pie charts. First thing I am going to do is create a basic State filled map; then I am going to use my Map options to zoom into the map and select all the West coast states. Once you select all the states that will be in the West Territory hover over one of the States till you see the dialog pop where you can select the group paperclip. Once you select that it will create a new field that will have all those states in one grouping. Do it again with all the States in the East, once you are done it should look like the image below. The last thing you will need to do is remove the State field from the details so that there is only the new grouping field in the mark card.
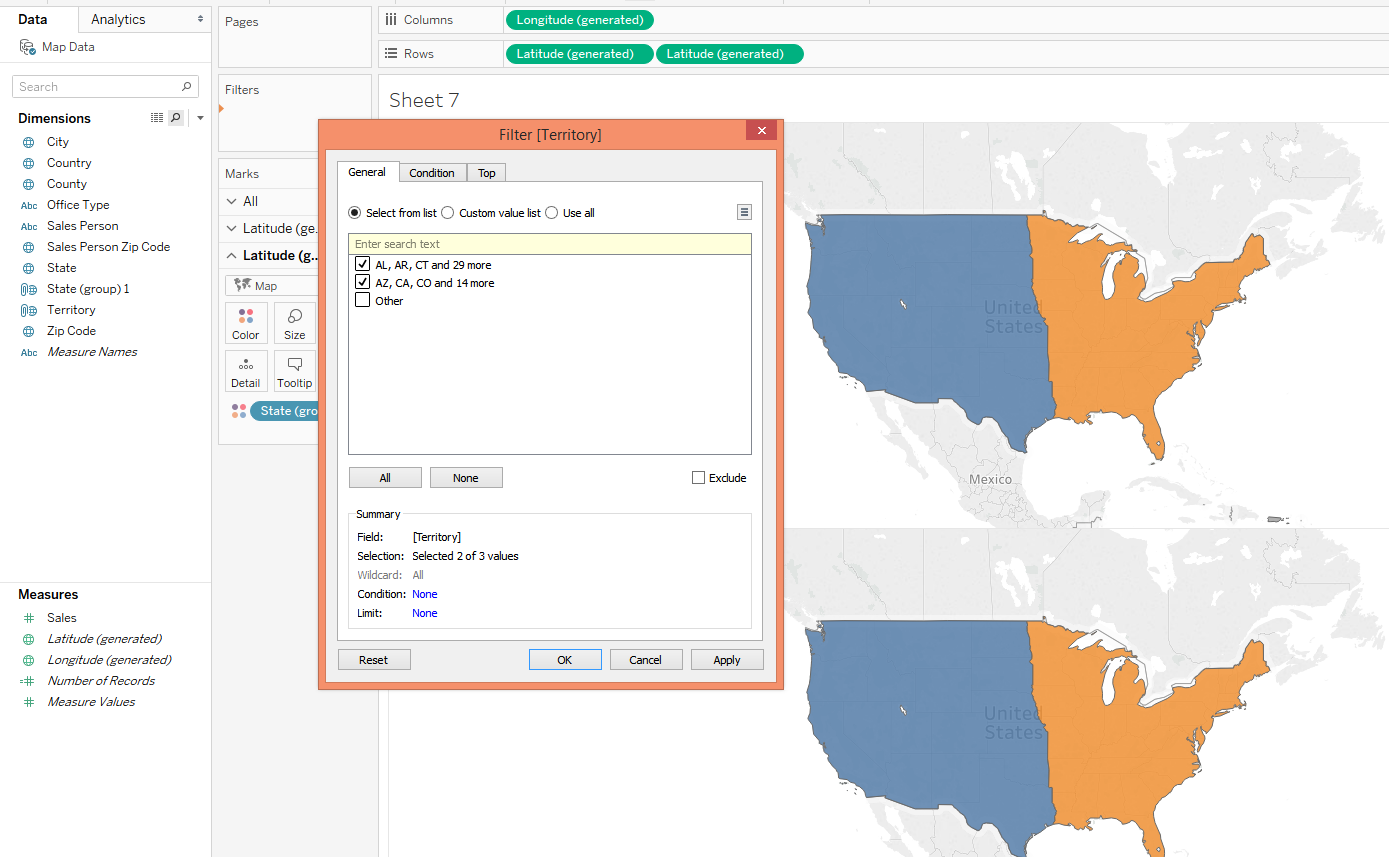
Next, we will need to add Latitude to the rows again, so we get the two Tableau maps in the same view. Before we move forward let’s rename the State (group) to Territory and filter out the Other territory.
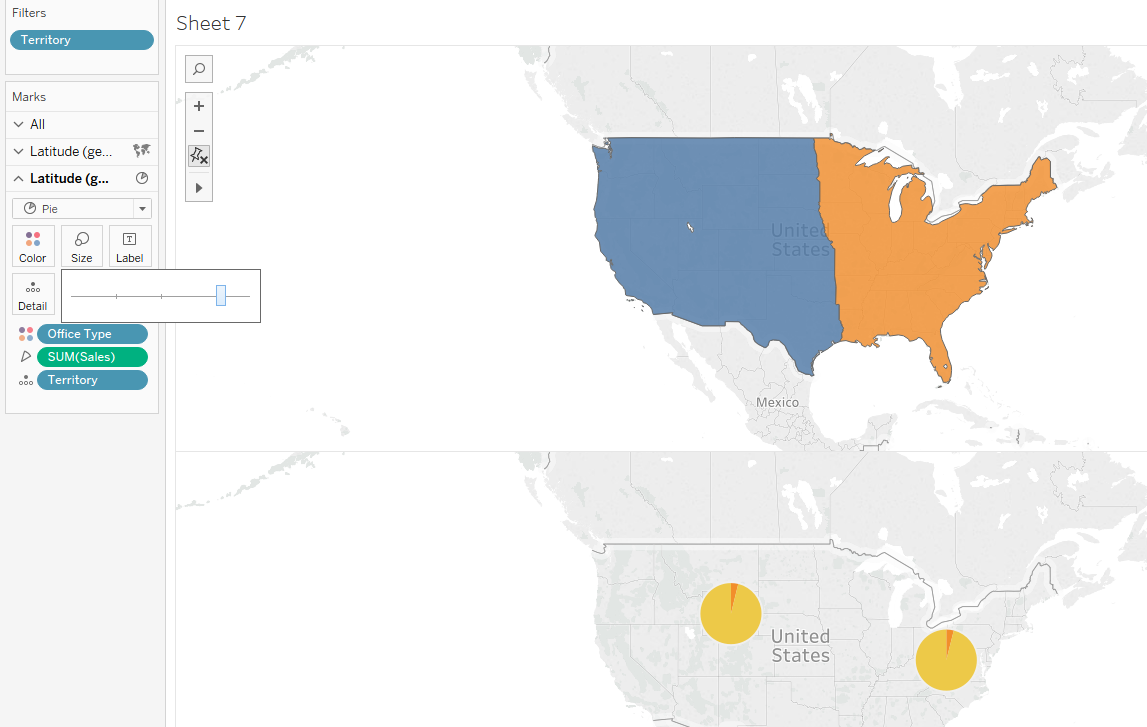
Now we need to change the bottom map to a Tableau Pie chart by changing the bottom mark card to Pie. Now move the Territory pill that is currently in the Color mark box and put it in the Detail mark box, put Office Type in the Color mark box and Sales in the Angle mark box. I then click on the size mark box and manually increase the size of the Pie chart so I can see it better.
Now you can add labels, do the dual axis option and clean it up till it looks like the picture below.
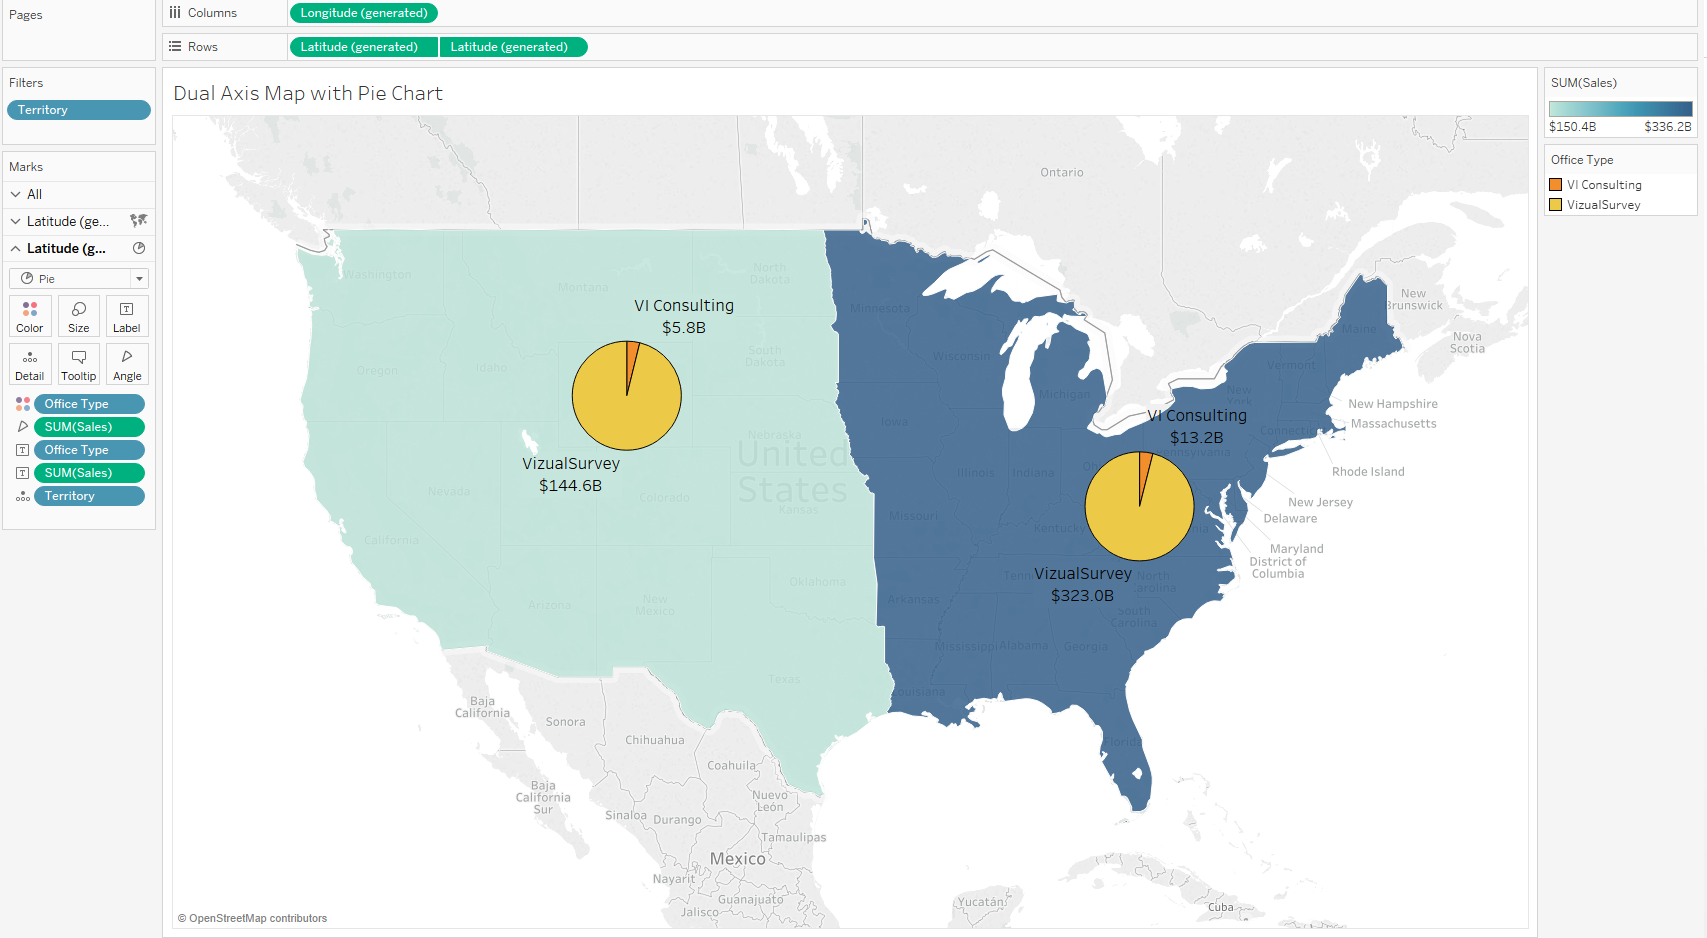
Tableau Dual Axis Custom Map
In this Tableau map example, we are going to create a Tableau custom map, I am going to show you a few different ways to play with the formatting. We first need to create the simple symbol Zip Code map below by filtering the data down to Los Angeles County and VI Consulting Office Type. I also went into the Tableau Map Layers and changed the background to dark and added streets and highways plus places names. From there I just increased the size of my circles by using the size box, all this is what we have already learned.
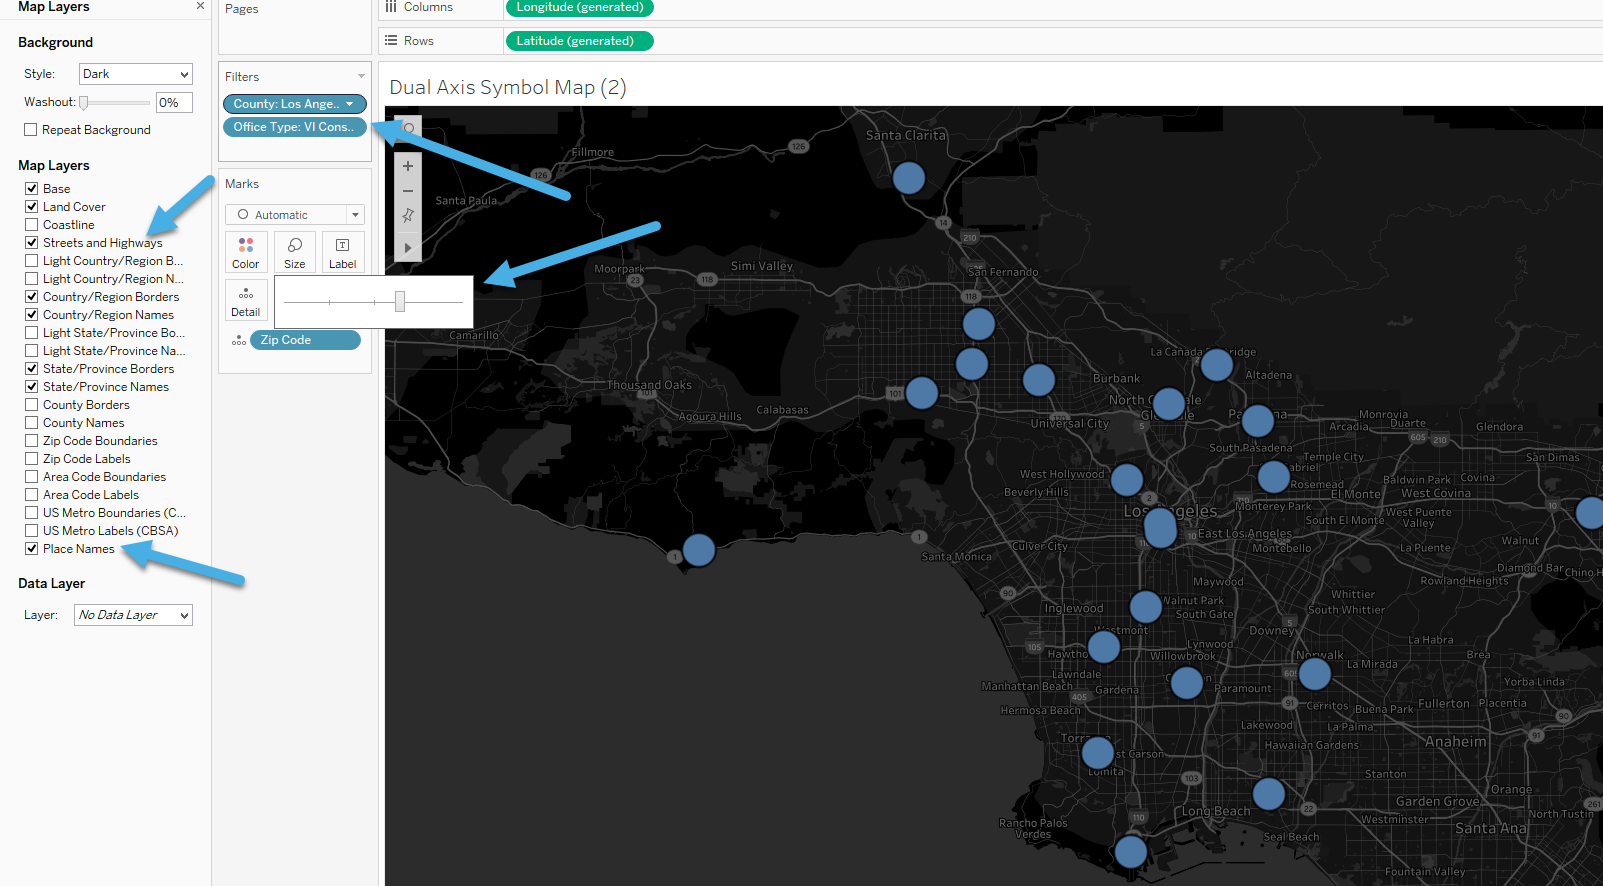
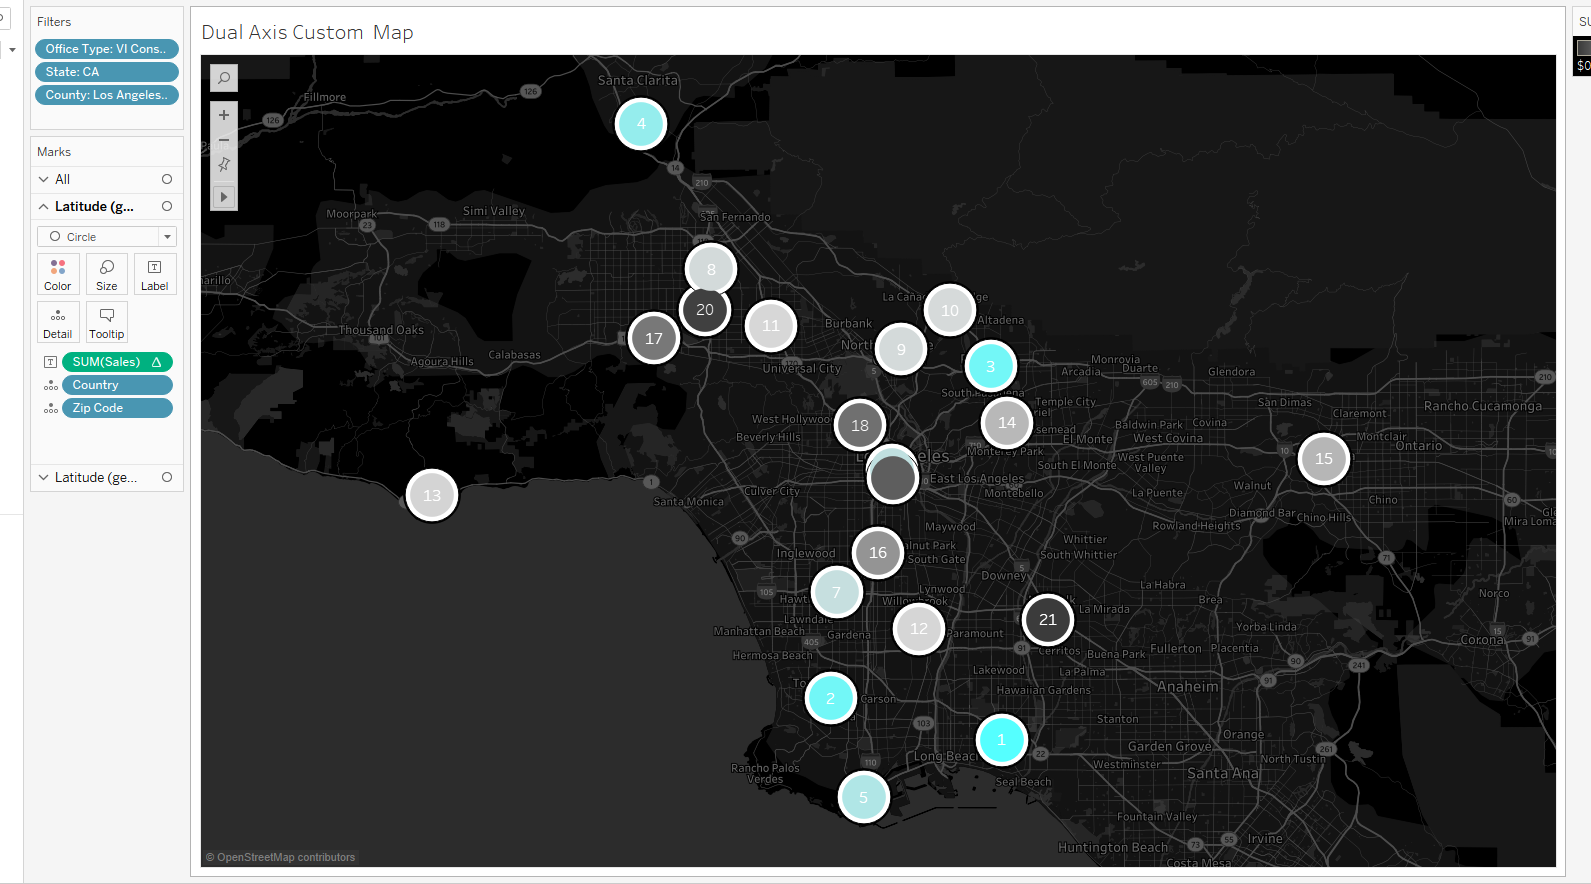
Now I am going to put Sales on the Label Mark box and change it to a Rank quick table calculation. From here I want to put the ranking in the circle, so I click on Labels and adjust the alignment. Now go ahead and hold control and grab the new quick table calculation pill and drag it onto the color Mark box to duplicate it and color the circles by Rank. Your mark type will probably change to a filled map, if so just click the marks type drop-down and change it to Circle.

Next will put Latitude on the rows next to the other Latitude pill to create the two Tableau maps again. Click on the middle Mark card which is the top map visualization and removes the Rank table calculation from the color and text mark box. Now you will change the color of the circle to white and increase the size some.
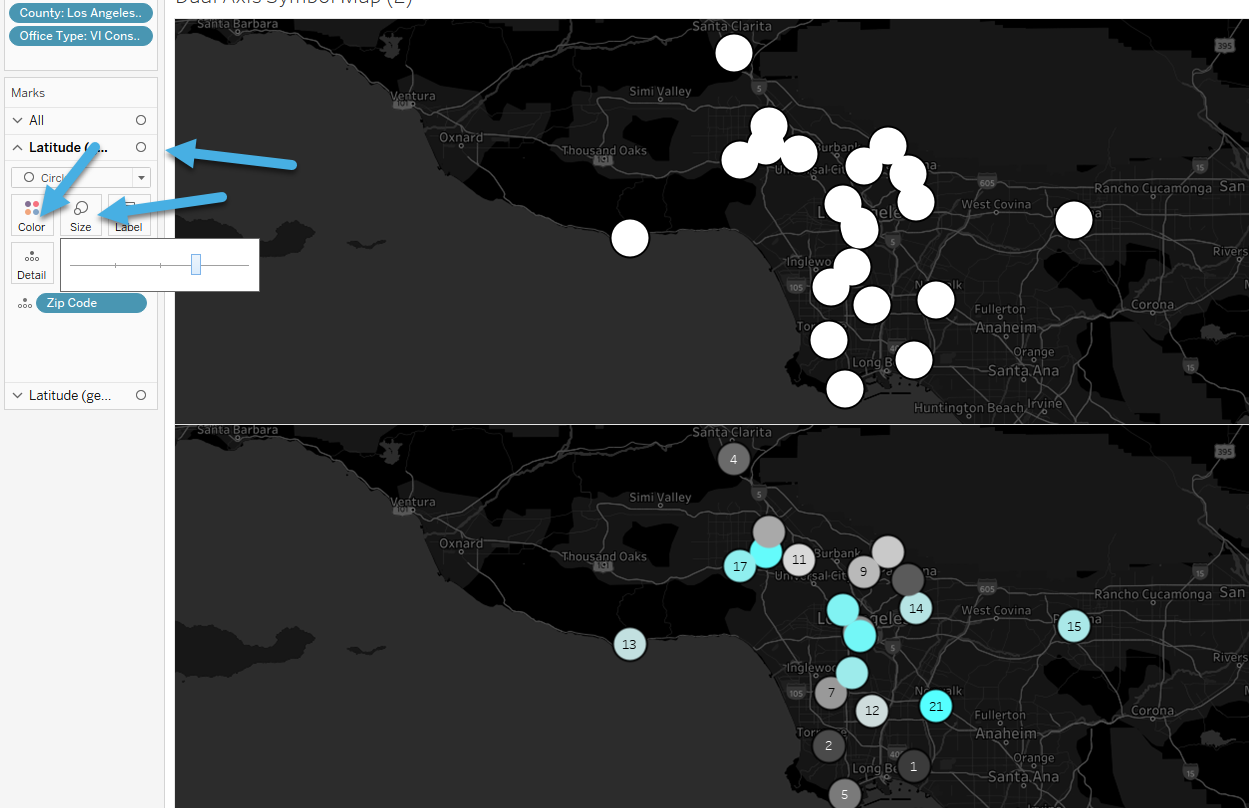
So now you have both Tableau maps how you want them, now all you have to do is overlay them by clicking on the most right Latitude pill and click dual axis. The ending viz will look like the picture if you made you label font color white and increase the size by clicking on the Label box. You can also change the Mark type for the top viz to shape which will give you a bullseye look.
Custom Tableau Maps with Shapes
Another cool thing you can do with Tableau maps is put custom shapes or icons on your map. You can download icons from a lot of different places. Below is a guide of the top sites I use to get icons.
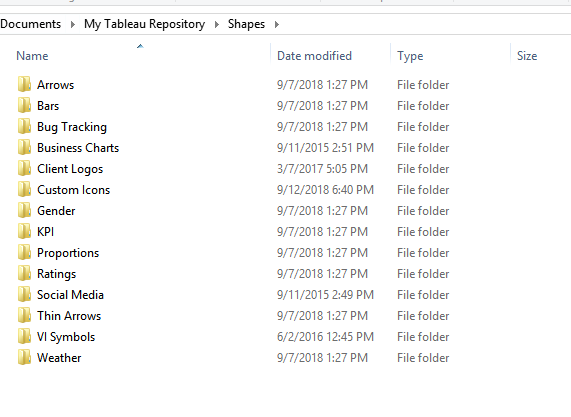
In this last Tableau map example, I will show you how to add custom shapes to Tableau and how to use them in a dual axis map. We are going to create a map where we can see where a Salesperson lives and compare it to his client’s office locations. The first thing you have to do is download the shape you want to use and then paste it in your Shapes folder that is in your Tableau Repository folder. You can create a new folder like I did or put it anywhere in the shapes folder. This folder will be downloaded when you install Tableau so go search for it if you haven’t seen it before.
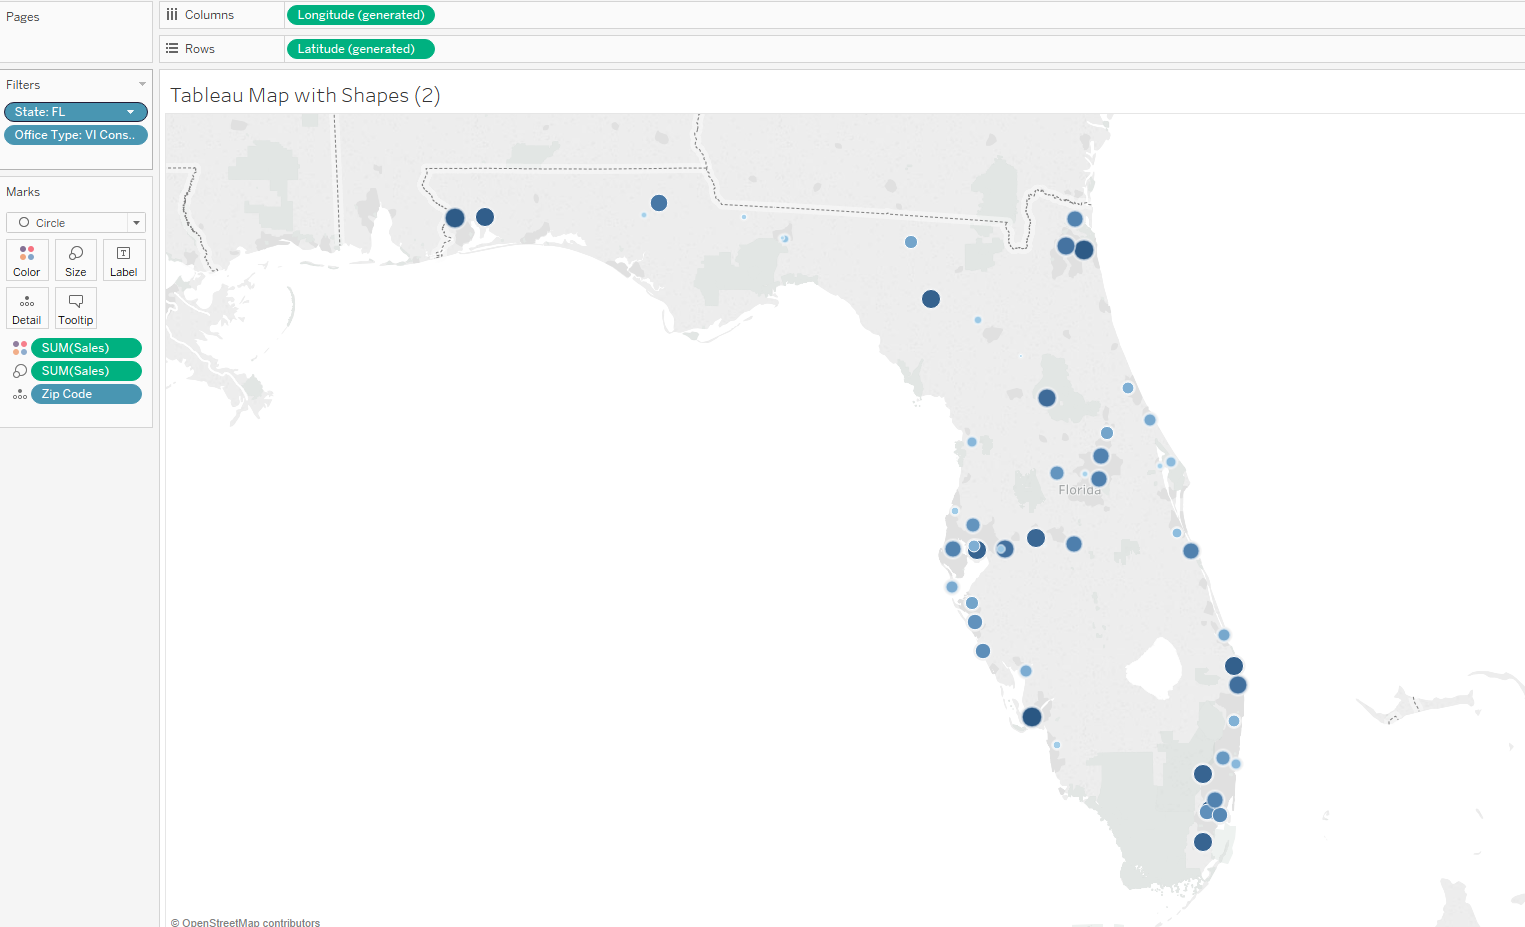
Now let’s go ahead and start making our visualization; first I will be creating a simple Zip Code symbol map like below. I filtered the map to the State FL and the VI Consulting Office Type.
Now I am going to start my dual axis map so I have two Tableau maps on top of each other again. I am going to go to the last mark card and replace the Zip Code with Sales Person Zip Code. Now remove all the other pills, so there is only the Sales Person Zip Code pill on the bottom marks card. From there we will change the Mark type to shape, click on the shape box, click on the circle on the left and then click on the Icon for the salesperson.
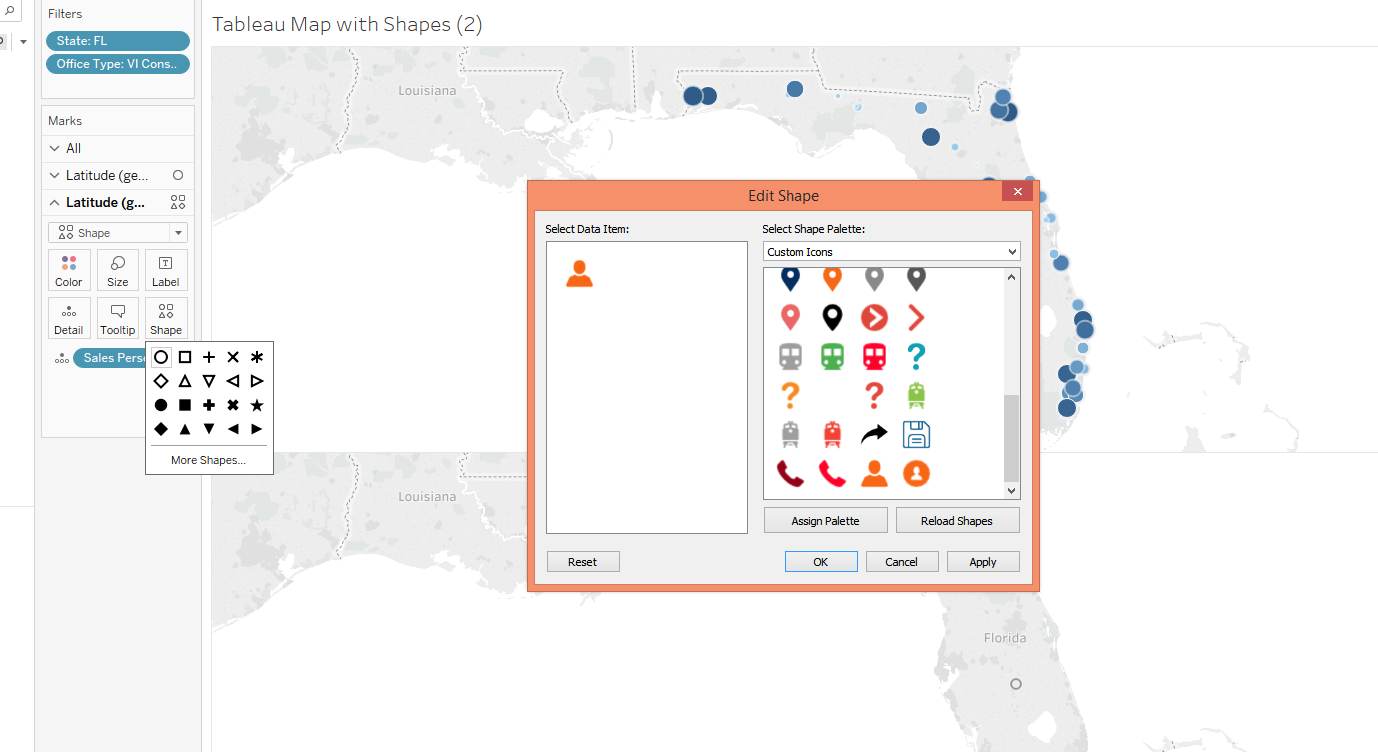
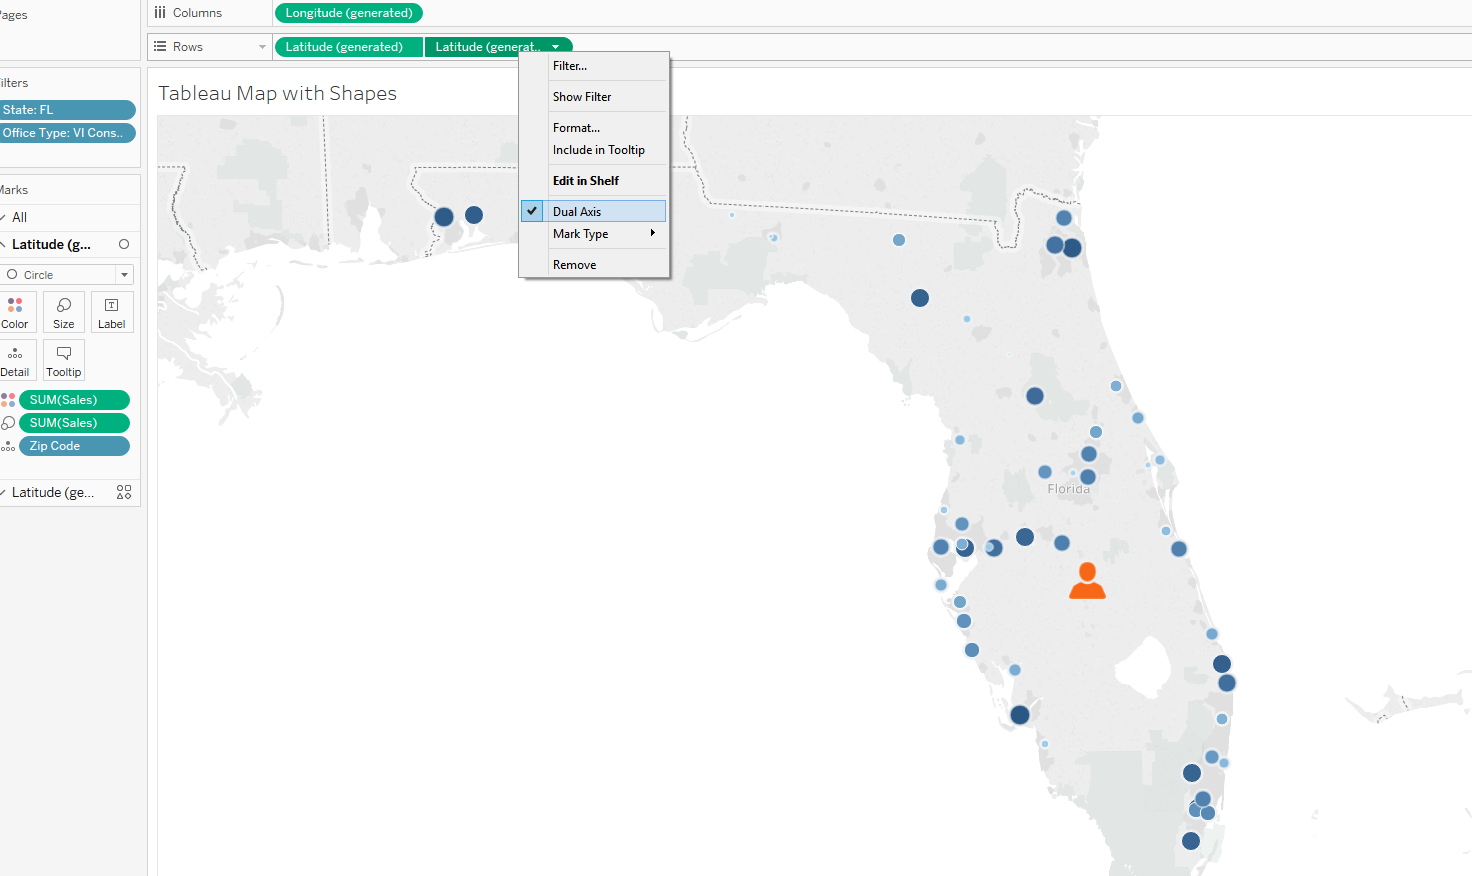
Go ahead and press ok and then increase the size of the shape so you can see it better. From here you make the map a dual axis map and clean it up.
I know that was a long one, but I think it’s important to know the ins and outs of mapping in Tableau since its one of the most popular viz types in Tableau. This is the core of Tableau maps, and everything after this is up to your imagination. I would love to see some Tableau maps you have created so please leave a picture or link to one of them below. Hoped you enjoyed this Tableau map tutorial, see you next blog!

